Customer Support
Customer Support
Section titled “Customer Support”Overview
Section titled “Overview”This Customer Support Procedure outlines FrontRunnerHC’s approach to delivering consistent and effective end-user support. It provides operational staff with guidance on how to manage client issues, apply required data standards, and use established support channels. Client requests may come through Operations Managers, Customer Success Managers, live chat, support tickets, email, or phone, and this procedure ensures each is handled in a timely and professional manner to maintain client satisfaction and operational efficiency.
1.0. Procedure
Section titled “1.0. Procedure”1.1. Live Chat Portal
Section titled “1.1. Live Chat Portal”This section describes the process for FRHC employees to login and use the Live Chat Support portal.
-
In a web browser, go to <www.liveperson.com>
-
Enter login information:
i. FRHC Acct #: 46509843
ii. User Name (assigned by FRHC Live Person Admin) and Password
-
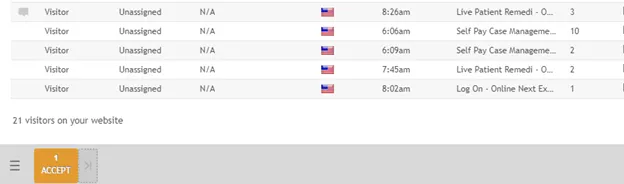
Once logged in, you will be notified if any user on the system is trying to reach FRHC Support.
i. To engage in live chat, open the Live Chat browser and click the flashing, orange “Accept” box in the bottom left of the window.
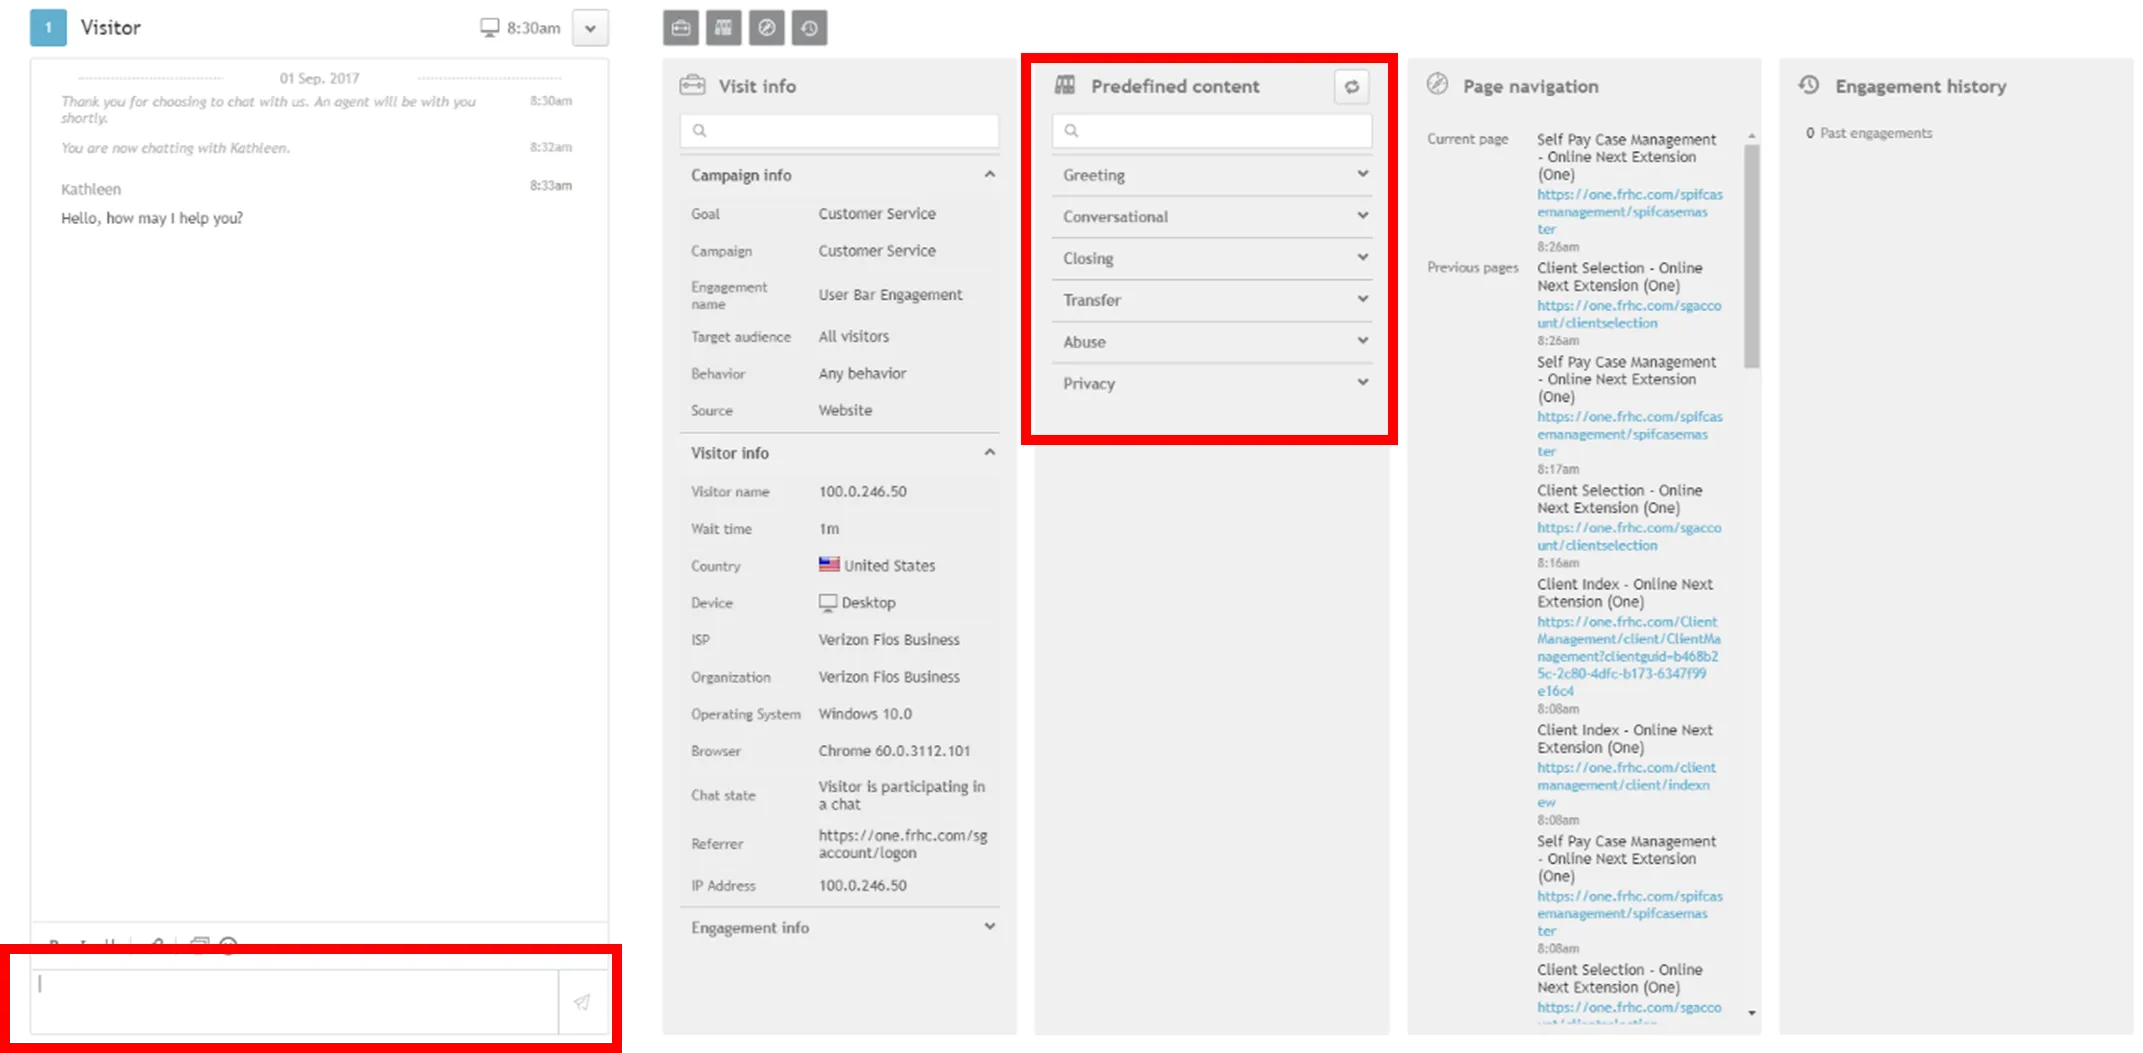
ii. Once the chat window opens, start chat with, “Hello, how may I help you?” or something similar. (There are suggested live chat phrases available in “Predefined Content” column)
Live Chat Tips:
- Use the suggested phrases available if appropriate or needed under “Predefined Content”
- You must ask for the user’s name and e-mail address as that information is not available to us.
- If the client uses any phrase that is negative (including answering with a “No”), red, frowning smiley face will appear with a warning that “Negative MCS has been detected in this conversation”. This is strictly derived from algorithms LivePerson uses and does not always indicate true negativity.
-
Once the user’s issues have been resolved, you should ask if anything else is needed.
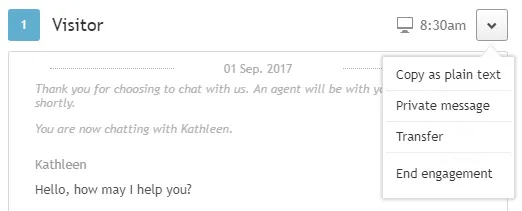
i. If the answer is No, thank the user and end the engagement by clicking the “v” in the top right of the chat box.
ii. Then click “End Engagement”
iii. To hide the conversation, click the “v” again, then select “Hide Conversation”
1.2. Support Tickets
Section titled “1.2. Support Tickets”This section describes the process for FRHC employees to check and address support tickets.
How to find support tickets:
-
Email: An e-mail is sent by the client to one of 3 email addresses based on the application:
i. Each email address is linked to a distribution list and a notification to that list is sent out when any support ticket is created.
ii. FRHC Users will then receive e-mail updates when there are any comments or status changes to a support ticket they created.
-
Operations Dashboard: All Support Tickets are available to FRHC employees in the one.frhc.com portal.
i. In the portal, navigate to the Operations Dashboard. Access is limited to only FRHC employees.
ii. Then select “Tickets” from the menu.
- Messages never opened by current user will be green, even if they are closed.
- Tickets are automatically sorted newest to oldest.
- User can filter tickets as needed.
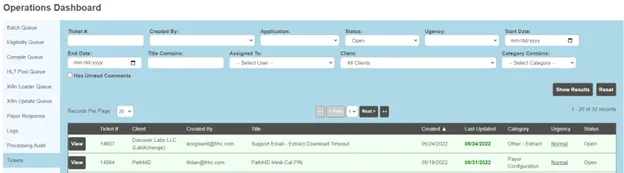
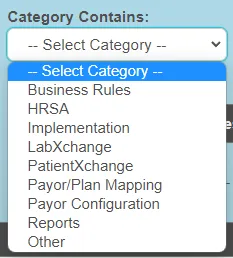
iii. Tickets can be sorted by Category:
1.3. User Management
Section titled “1.3. User Management”This section describes the process for adding a new user to the system. User’s assigned as “ClientAdministrators” also have the ability to add or block users. If they would like to add their own users, they may refer to the “User Guide - User Management” for step by step instructions.
FOR THE FRHC EMPLOYEE:
-
Ask client for the Email address, first name, and last name of the new user as well as whether this user’s role will mimic any other client users. If not, ask for role assignments needed and for Credit Balance clients: the credit balance max daily approval amount.
-
In the portal, change client to the one where the user is to be added.
-
Then select “Users” from the main menu.
-
In the User Management screen, select the “Add User” button in the top right of screen.
-
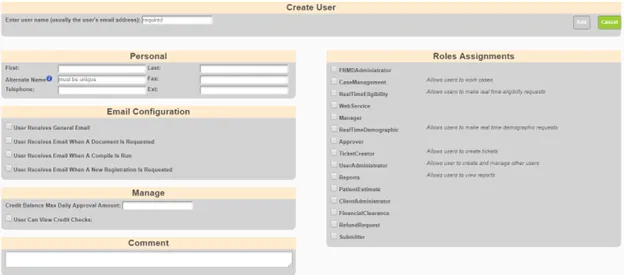
In the “Create User” section, enter the user’s email address in the “Enter User Name” field.
-
In the “Personal” section, enter the user’s first and last name in the “First” and “Last” fields.
i. No other Personal fields needs to be filled in.
ii. For Credit Balance Users: Alternative Name field will be posted back to the billing systems. If left blank, it will default to email address with everything dropped from “@” on.
-
In the “Email Configuration” section, select the “User Receives General Email” checkbox.
i. If needed, select other boxes as appropriate.
-
In the “Manage” section:
i. For Credit Balance Users: If appropriate, fill in Credit Balance Max Daily Approval Amount.
ii. For Credit Users: If appropriate, check box for “User Can View Credit Checks”
-
The “Comment” section can be left blank.
-
In the “Roles Assignments” section, select the roles as applicable.
-
Select the applicable client name and applications needed. (See Figure 5)
-
To save profile and add new user.
i. Under the “Create User” section, select the “Add” button.
ii. You will receive a confirmation message displayed on the screen that a welcome email was sent to the user, containing the URL to the FRHC portal, their username (email address) and a temporary password. The user will be instructed to change their password upon initial login.
1.4. Terminate a User Profile
Section titled “1.4. Terminate a User Profile”This section describes the process terminating a user from the system. User’s assigned as “ClientAdministrators” also have the ability to add or block users. If they would like to add their own users, they may refer to the “User Guide - User Management” for step by step instructions.
FOR THE FRHC EMPLOYEE:
-
Ask client for the Email address of the user to be terminated.
-
In the portal, change client to the one where the user is to be added.
-
Then select “Users” from the main menu.
-
Select the applicable user from the list of profiles.
-
Select the “Block” button for the applicable user.

-
User will be unable to access the FRHC portal from this point forward.
1.5. Password Management
Section titled “1.5. Password Management”This section describes the instructions to be given to a user when they forgot or need to reset their password.
FOR THE USER:
-
Access the FRHC portal:
-
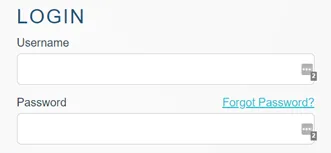
On the landing page, click the “Forgot Password” link.
-
Enter your email address and click “Recover Password”.
-
You will then receive an email with instructions to reset your password.
1.6. Unlock Account
Section titled “1.6. Unlock Account”This section describes the process for unlocking a user. This has to be done by an approved FRHC employee.
FOR THE FRHC EMPLOYEE:
-
In the portal, change client to the one where the user’s account is locked.
-
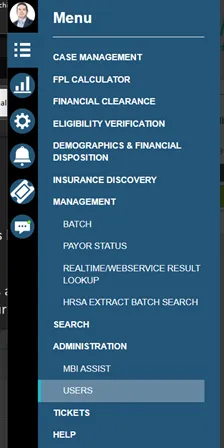
Then select “Users” from the main menu.
-
Click “Users” Tab
-
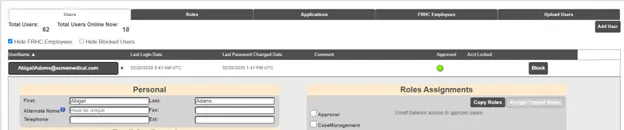
Select the user’s email address for the locked account.
-
Click “Unblock”, and the account will immediately display that the account was unlocked.

1.7. Check Batch Status
Section titled “1.7. Check Batch Status”-
Navigate to the Operations Dashboard select the Batch Queue tab.
-
The first section displays all of the loaded batches that have not yet been approved to process.
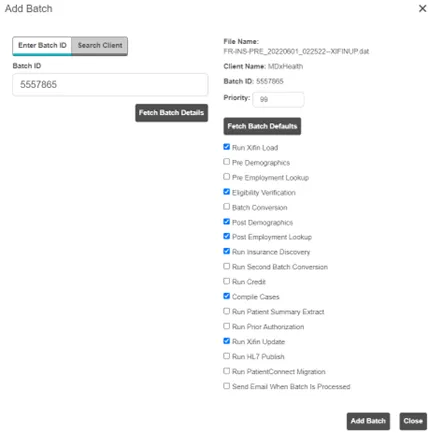
i. These batches can be either processed or removed.
ii. When choosing to process a batch you can select which steps the batch should go through.
iii. By selecting “Fetch Batch Details” you can pull in the default steps for the client.
-
The lower section contains all of the batches currently in progress.
i. You can edit the processing priority
ii. Add a new batch
iii. Refresh the list

1.8. Manually Add Batch
Section titled “1.8. Manually Add Batch”-
Select “Add Batch” from the Operations Dashboard Batch Queue.
-
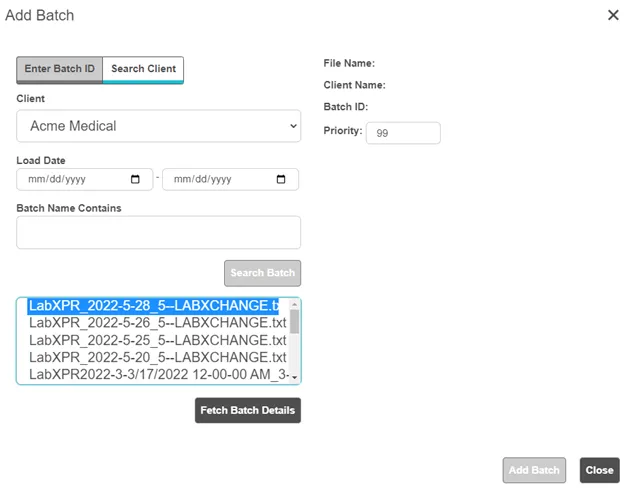
You can enter the batchID if you know it or you can do a search by client to pull in a previously loaded batch.
-
Once you select the batch you can “Fetch Batch Details” to pull in the default processing steps.
1.9. Eligibility Queue
Section titled “1.9. Eligibility Queue”- Shows all batches currently at the eligibility step of the processing. This list can be reprioritized and/or refreshed.
1.10. Compile Queue
Section titled “1.10. Compile Queue”- Shows all batches currently at the compile step of the processing. This list can be reprioritized and/or refreshed.
1.11. Processing Audit
Section titled “1.11. Processing Audit”- This is a lookup tool that allows you to input data to view the Processing Audit Trail table in the database. This is primarily used to find out the reason for a file that failed to load. You can insert the JobID and the error messages for the file will be displayed.
1.12. Tickets
Section titled “1.12. Tickets”- Allows for the searching/filtering of tickets. This page will display all tickets for clients that the user has access to. The tickets can be viewed and updated.
2.0. Definitions and Terms
Section titled “2.0. Definitions and Terms”Business Rule : A way to group and/or categorize results. Business Rules can be set to either “Post” or “No Post” to govern what can be pushed back to the client’s billing system.
Case : Results are displayed as cases in Case Management.
Client : The entity who has signed a contract/agreement with FrontRunnerHC.
COB : Coordination of Benefits.
Compile : System tool that applies business rules to cases.
HL7 : Health Level 7. An integration language for sending and receiving data.
Posted vs Closed : A posted case was updated in the client billing system. A closed case is one that no longer needs to be reviewed.
RegMaster : Patient level identifier.
SPIF : Self Pay Insurance Finder. An old acronym for PatientRemedi.
Ticket : Support ticket.
Trading Partner : This is the insurance company that we send eligibility transactions to.
VisitMaster : Visit level identifier.
3.0. Revision History
Section titled “3.0. Revision History”| Rev | Description | Date | Approved |
|---|---|---|---|
| - | Original Document | January 2024 | T Folan |
| 1.0 | Updated and approved for 2025 | August 2025 | T Folan |
